RP2040 Controller
RP2040 is a Raspberry Pi microcontroller. The most well-known board based on it is the Raspberry Pi Pico.
For DIY peripherals around a 3D printer, RP2040 is one of the most practical options: it is cheap, well documented, works with 3.3V logic, is convenient to flash over USB, and is well suited as an additional MCU for Klipper.
Where RP2040 is useful
RP2040 is good for:
- additional I/O board for Klipper;
- fan controller via MOSFET/drivers;
- reading thermistors and simple analog sensors;
- connecting OLED via I2C;
- connecting RFID/NFC via SPI or UART;
- controlling servo with PWM signal;
- simple standalone board without Wi-Fi;
- test bench for sensors and interfaces.
If you need networking out of the box, it is easier to look at ESP32 or Pico W. If you need an additional wired MCU for Klipper, RP2040 is often more convenient.
Why Raspberry Pi Pico is convenient
Raspberry Pi Pico is a ready-made dev board based on RP2040. It already has USB, flash memory, power regulator, a BOOTSEL button, and exposed pins.
Pico advantages:
- low cost;
- decent documentation and pinout;
- USB for flashing and communication;
- many GPIO;
3.3Vlogic;- 2 UART, 2 SPI, 2 I2C;
- 16 PWM channels;
- 3 ADC inputs on exposed Pico pins;
- PIO for non-standard interfaces;
- convenient UF2 flashing via USB mass storage.
For a first project, it is better to get a Pico or Pico H with soldered pins than a bare RP2040 chip. A bare chip requires a custom board, flash memory, power, USB, routing, and testing.
BOOTSEL and UF2
One of Pico's strengths is a simple flashing process:
- Hold the
BOOTSELbutton. - Connect USB to your computer.
- The board appears as a USB drive.
- Copy the
.uf2firmware file. - The board reboots with the new firmware.
This is convenient for MicroPython, CircuitPython, C/C++ projects, and Klipper firmware. For a newcomer, this method is usually more understandable than ST-Link, DFU, or a separate USB-UART.
RP2040 and Klipper
RP2040 is a good candidate for an additional MCU in Klipper.
Typical scheme:
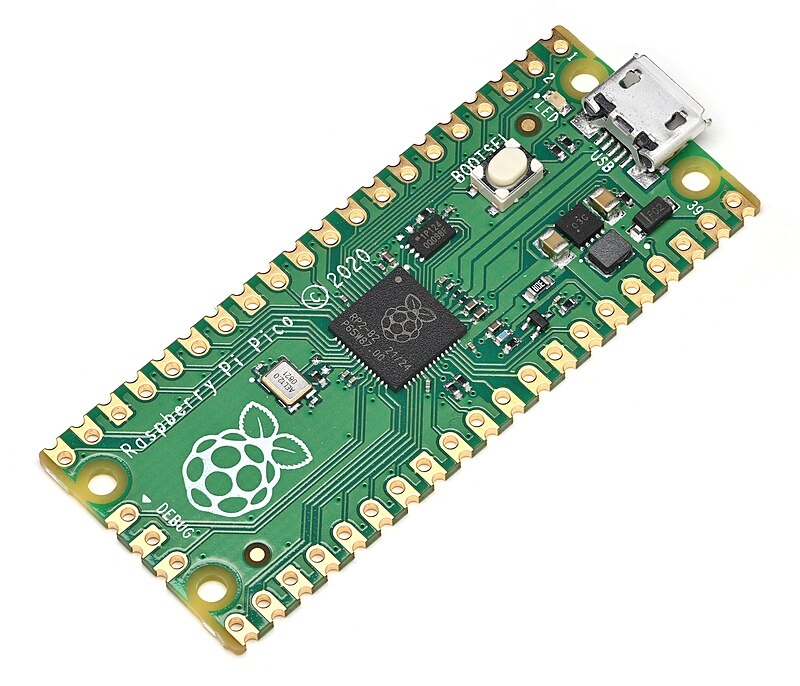
Source: Wikimedia Commons, Phiarc, CC BY-SA 4.0
The idea is:
- Linux host with Klipper remains the primary controller;
- Pico/RP2040 is flashed with Klipper MCU firmware;
- a main or additional
[mcu]section is added toprinter.cfg; - RP2040 pins can be used for fans, sensors, PWM, and other peripherals;
- power loads are still connected via MOSFET, driver, relay, or SSR.
This is useful when you need to separate part of the peripheral into a separate block: for example fans, camera sensors, filter, backlighting, button, limit switch, or service outputs.
GPIO and 3.3V logic
RP2040 works with 3.3V logic. This means:
- do not apply
5Vto GPIO; - for
5Vmodules you may need a level converter; - I2C pull-ups should be to
3.3V; - GPIO should not power a load directly;
- a fan, LED strip, relay, or heater needs an external switch/driver.
If a module is "Arduino-compatible," it does not mean it is safe for RP2040. You need to check input levels and pull-ups.
Power
Pico is usually powered from USB or via the VSYS pin. The board has a regulator for powering the microcontroller.
Practical rules:
- do not power motors, servos, and relays from the
3V3pin on Pico; - use separate power for loads;
- connect common GND with low-voltage drivers;
- check where power to
VSYSand USB comes from; - account for the current of external modules, not just Pico itself.
If Pico resets when a servo or fan starts, the problem is almost always power, ground, or noise.
ADC on Pico
Pico has ADC inputs that you can use for simple analog tasks:
- thermistor via voltage divider;
- potentiometer;
- light sensor;
- measuring low voltage via voltage divider.
Limitations:
- ADC input must not exceed safe GPIO voltage;
- to measure
12Vor24Vyou need a divider and protection; - a thermistor requires a correct resistor, table/model, and mechanical contact;
- ADC does not replace a multimeter or industrial meter.
For heaters, remember: ADC only reads the sensor. Heating safety is provided by the power switch, firmware limits, fuse, and independent thermal protection.
PIO in simple terms
PIO is Programmable I/O. RP2040 has small programmable blocks that can generate or read non-standard signals without constant load on the main code.
A newcomer does not need to start with PIO. But this is one reason why RP2040 is popular for interfaces, timing, and non-standard peripherals.
For a simple iDryer-like device, regular GPIO, PWM, I2C, SPI, UART, and ADC are usually enough.
Pico, Pico W, and Pico 2
It is important not to confuse the boards:
- Pico / Pico H — classic RP2040 board without Wi-Fi;
- Pico W / Pico WH — RP2040 with Wi-Fi/Bluetooth module on board;
- Pico 2 / Pico 2 W — new generation based on RP2350, this is not RP2040.
If an article or project says RP2040, it usually means the first generation Pico or a compatible board. Pico 2 is similar in concept, but it is a different microcontroller, and firmware/pin compatibility needs to be checked separately.
What to check before buying
Before buying an RP2040-based board, check:
- whether it is an original Pico, Pico W, or clone;
- whether pins are soldered;
- whether it has the USB connector you need;
- whether there is a proper pinout;
- which GPIO are available;
- whether you need Wi-Fi;
- whether the board is suitable for Klipper firmware;
- how the board and loads will be powered;
- whether you have enough ADC/PWM/I2C/SPI/UART for the task;
- whether there is room in the enclosure for mounting.
If planning a Klipper MCU, check existing instructions for your specific board and flashing method in advance.
Common mistakes
- applying
5Vto RP2040 GPIO; - powering a servo or relay from
3V3; - forgetting common GND with MOSFET/driver;
- thinking Pico W is a regular Pico and not accounting for used resources/Wi-Fi power;
- buying Pico 2 expecting exact RP2040 behavior;
- measuring
12V/24Von ADC without a divider; - connecting a heater directly to a pin;
- choosing RP2040 for Wi-Fi task when a regular Pico has no Wi-Fi;
- not checking the pinout of a specific clone.
Key points
RP2040 and Raspberry Pi Pico are a strong choice for wired DIY peripherals and additional MCU in Klipper. The board is cheap, understandable, well documented, and convenient to flash.
But RP2040 is a 3.3V microcontroller, not a power controller. Loads are connected via drivers, MOSFET, relays, or SSR. For Wi-Fi tasks, you need Pico W or another networked controller.
Related materials
- Raspberry Pi: RP2040 specifications — official RP2040 specifications: CPU, SRAM, UART/SPI/I2C, PWM, USB, and PIO.
- Raspberry Pi Documentation: Pico-series microcontrollers — differences between Pico, Pico W, Pico 2, GPIO, ADC, PWM, and board variants.
- RP2040 Datasheet — detailed technical description of the microcontroller, peripherals, PIO, GPIO, and ADC.
- Raspberry Pi Pico Datasheet — documentation for the Pico board itself: power, USB, exposed GPIO, and board limitations.
- Raspberry Pi Documentation: C/C++ SDK - Your First Binaries — official example of BOOTSEL, USB mass storage
RPI-RP2, and copying UF2 to Pico. - Klipper Configuration Reference — context of RP2040 support in Klipper and settings for peripherals like I2C.